I had an annoying problem on my 2015 MacBook Pro Mac OS when watching movies on Netflix using Safari. When in full-screen mode, the display would flash/flicker a couple of times a minute. Well, after digging around, I found a solution for it. Why Does the screen keep flashing when watching Netflix? Some MacBook Pro’s […]
[Continue reading]PlayStation VR Motion Controller Battery Refuses To Charge

If you leave your PlayStation Motion Controller without charging it for a long time, the battery will not charge. Even after you press the reset button, the controller refuses to recharge. Replacing the battery is an easy fix, but expensive, and there is another way of getting the PlayStation Controller to work again.
[Continue reading]Ambien as a Defense For Bad Behavior

There’s been a lot of chatter on the internet of the “Ambien defense”. It’s quite a good defense for weird behavior. I’m talking as a recovering Ambien abuser for over ten years.
[Continue reading]Aneng AN8009 Improve Accuracy, measuring Speed
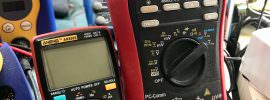
Just got my new Aneng AN8009 Multimeter in the mail. I’ve made an old post about improving the responsiveness of the Aneng AN8008 in an earlier blog post. I loved that meter, but I gave it to my son who is just beginning on his electronic journey. So naturally, I needed a replacement. After checking […]
[Continue reading]HifiBerry DAC+ Click When Changing Song
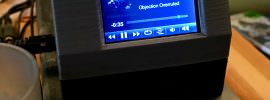
My current music setup is a Raspberry Pi 3 with a HifiBerry DAC+ audio card as my music player. It works perfectly, except for one annoying thing. The new HifiBerry DAC+ makes an audible click or poping sound when changing the sampling rate. I have a lot of recordings in higher resolution than CD-quality of […]
[Continue reading]- « Previous Page
- 1
- 2
- 3
- 4
- 5
- …
- 37
- Next Page »